November 16, 2023
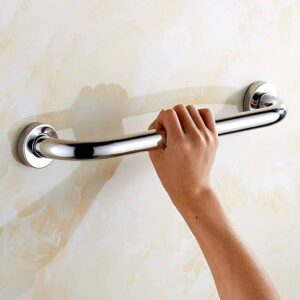
Will Grab Bars Damage My Wall?
Yes, installing a grab bar will require drilling into your wall, which will cause some damage. The extent of the damage depends on the type of wall and the installation process. Grab bars are intended to be permanent fixtures which is why their installation requires drilling into the wall; however, the damage to your wall if usually minimal and can easily be repaired with spackle or drywall compound.
Which grab bar installation factors affect wall damage?
1. Wall Material
- Drywall: The most common wall material, relatively easy to repair after installation.
- Tile: More susceptible to damage due to drilling. Repairing holes in tile can be challenging and often requires professional help.
- Concrete or Masonry: Requires specialized drilling equipment and anchors. While less common in residential settings, damage can be more significant if not done correctly.
2. Installation Technique
- Precision Drilling: Accurate hole placement minimizes damage.
- Anchor Selection: Using the appropriate anchors for the wall material prevents excessive force and reduces damage.
- Torque Control: Overtightening screws can crack tiles or damage drywall.
3. Grab Bar Weight and Size
- Heavier grab bars: Require larger screws and anchors, potentially increasing damage.
- Longer grab bars: May require multiple mounting points, increasing the number of holes drilled.
4. Repair and Maintenance
- Prompt Repair: Addressing damage quickly prevents further deterioration.
- Caulk and Sealants: Can help protect the wall around the grab bar from moisture damage.
How can I minimize wall damage from grab bar installation?
While it’s impossible to completely avoid wall damage when installing a grab bar, you can take steps to minimize it.
1. Planning and Preparation:
- Locate Studs: Use a stud finder to pinpoint wall studs for secure anchoring.
- Choose the Right Location: Consider where the grab bar will be least noticeable.
- Protect the Area: Use painter’s tape to protect the wall around the drilling area.
2. Installation Techniques:
- Use Appropriate Anchors: Select anchors designed for your wall type (drywall, tile, concrete).
- Drill Carefully: Avoid excessive force and ensure the drill bit is sharp.
- Tighten Screws Gradually: Over-tightening can cause damage.
3. Post-Installation Care:
- Caulk and Sealant: Apply a bead of caulk or sealant around the grab bar base to prevent water damage
- Repair Promptly: If there’s minor damage, repair it as soon as possible.
4. Additional Tip:
- Consider a Professional: For complex installations or concerns about wall damage, hiring a professional is recommended.
- If you are in need of a local professional installer, just fill out this form: Grab Bar Installation Request Form
By carefully considering these factors and employing proper installation techniques, you can minimize wall damage while ensuring the safety and stability of your grab bar.
Even though it causes slight damage, why is drilling crucial for grab bar installation?
Drilling is the most secure method for installing a grab bar. It ensures that the bar is firmly anchored to the wall, providing maximum support and safety.
- Weight Support: Grab bars are designed to support weight. Drilling into wall studs provides the strongest anchor point, preventing the bar from pulling out under pressure.
- Stability: A securely installed grab bar prevents accidents and falls. Drilling ensures the grab bar remains steady during use.
- Durability: Drilling into the wall provides a long-lasting and reliable installation. Adhesive or suction cup options, while convenient, often lack the necessary strength and durability.
While there are alternative methods like adhesive or suction cup grab bars, these options are generally not recommended for safety reasons, especially for individuals with mobility issues. Always prioritize safety when choosing a grab bar installation method.
How can I repair wall damage from grab bar installation?
The good news is that repairing damage from grab bar installation is usually a straightforward process.
Tools and materials you’ll need:
- Drywall repair kit (includes patch, tape, and compound)
- Putty knife
- Sandpaper
- Paint that matches your wall color
Steps:
- Remove any debris: Clean out the hole of any loose drywall or anchor remnants.
- Apply drywall patch: Cut a drywall patch slightly larger than the hole and insert it into the hole.
- Apply drywall compound: Spread a thin layer of drywall compound over the patch, ensuring it’s smooth.
- Let dry: Allow the compound to dry completely.
- Sand: Once dry, sand the area smooth to remove any bumps.
- Apply additional coats: If needed, apply another layer of compound and sand again.
- Prime and paint: Prime the repaired area and then apply matching paint to blend it with the wall.
Tips:
- For larger holes, you might need to cut out a section of drywall and replace it.
- If you’re unsure about the repair process, consider hiring a professional.
- To prevent future damage, ensure the grab bar is installed correctly with the appropriate anchors.

All grab bars on GrabBars.com come with a mounting hardware kit, which includes all of the screws needed for secure installation. Depending on the type of wall you are installing your grab bars onto, there are also separate anchoring devices that are highly recommended to ensure the safest and most secure installation.
Take a look at all of our stainless steel grab bars here: Grab Bars
Take a look at all of our anchoring devices here: Grab Bar Anchoring Devices
If you have any questions about which grab bars or anchoring devices are right for your bathroom, email us at [email protected], live chat with us on GrabBars.com, or give us a call at 704-800-4629 and we’ll be happy to help.
