1 1/2" Inch Double Jacket Discharge Hose has been added to your cart.
Quantity: 1
Sorry, we do not have enough stock. We have 8 remaining and you have added more than 8 to your cart.
Which bathtub grab bars do I need and where should I place them? (Quantity, Shape, Length, Wall Location, and Placement Height).
This is a guide for residential bathtub grab bar placement (such as in a private home / residence), where grab bar placement is completely up to the discretion of the user.
For commercial bathtub grab bar placement (such as in a public facility) that must abide by Americans with Disabilities Act (ADA) placement guidelines, please read our ADA Bathtub Grab Bar Placement Guide.
For basic slip prevention in a bathtub, at a minimum, we recommend two (2) bathtub grab bars in the following tub wall locations:
Entry Grab Bar
Side Wall Grab Bar (Bottom Level)
For advanced slip prevention in a bathtub, we recommend four (4) bathtub grab bars in the following tub wall locations:
Entry Grab Bar
Side Wall Grab Bar (Bottom Level)
Side Wall Grab Bar (Top Level)
Front Wall Grab Bar
To learn more about where we recommend placing each bathtub grab bar, continue reading below:
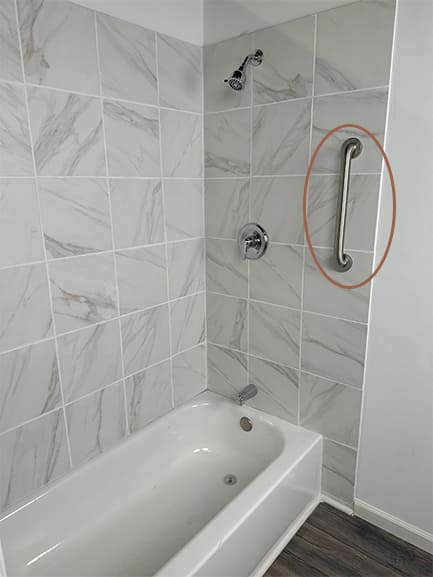
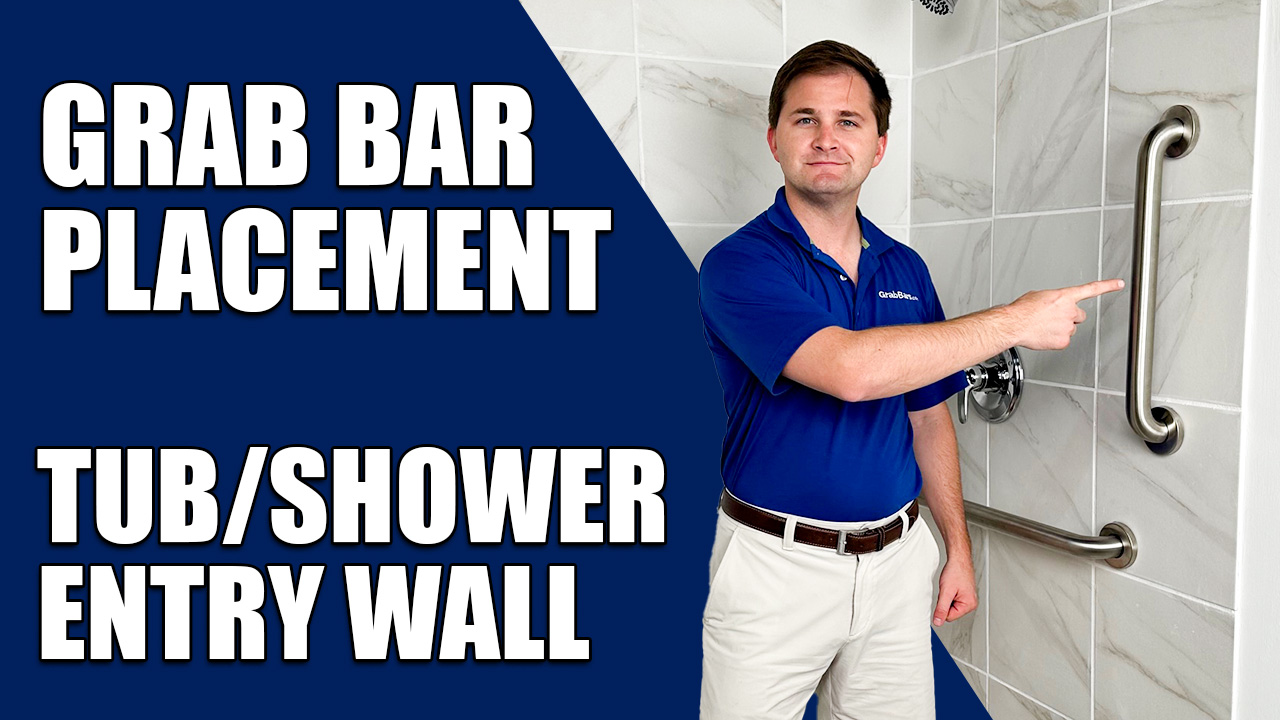
#1 Entry Grab Bar:
Why is it important?
An entry grab bar is the most important bathtub grab bar because most falls occur at the point when the person is making the step over the bathtub wall, usually while wet.
This grab bar is critical to steady the transition between the bathroom floor and the bathtub floor, where there is a tub wall / lip (usually around 14″ – 16″ tall) to step over.
An entry grab bar will help overcome the fear one has when putting their entire body weight on one leg while stepping over the height of the tub wall.
The tub entry grab bar can also be used for pulling oneself safely out of a seated position while in the bathtub (whether that be from the bathtub floor, a bath chair, or a bathtub bench).
When entering the bath, an entry grab bar will prevent any need or habit of grabbing and hanging onto bathroom fixtures, sliding glass doors, shower curtains, or towel bars, which all have limited weight capacities and are dangerous body weight support methods.
The most common length would be 24″, 30″, or 36″. We do not recommend going below 18″ as it would limit vertical coverage (the grab bar would be too high and out of reach when reaching from a seated position).
The longer the entry grab bar, the lower it will go to the bathtub floor when installed.
We recommend a standard smooth grab bar surface. You can also choose a peened safety grip, as some find that this improves grip when the hand is wet.
Where should I place and install the entry grab bar?
Place the entry grab bar vertically about 4-6″ inward on the wall closest to the tub entry point, which is commonly the wall that has the bath control valves.
We do not recommend placing the grab bar too far from the tub wall outer edge – try to keep it as close to the bathtub entrance as possible.
Vertical height placement of the entry grab bar is up to the discretion of the user, and often comes down to height of the user and where the hand reaches comfortably when entering or exiting the bathtub. When seated in the bathtub, the hand should always be in reach of the bottom of the vertical entry grab bar.
Any other recommendations?
If a bathtub has a built-in bath seat, we would also recommend installing an entry grab bar on both sides of the bathtub, as entry patterns can change depending on placement of the bathtub seat.
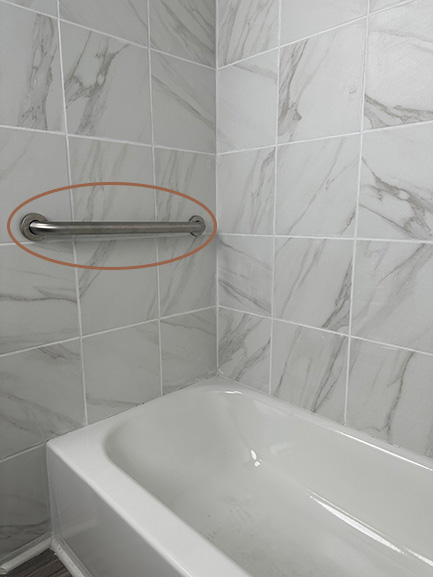
#2 Side Wall Grab Bar (Bottom Level):
Why is it important?
A bottom level side wall grab bar is important for hand grip when adjusting oneself while seated on the bathtub floor or in a bathtub seat, and when pulling oneself upward from a seated position to a standing position (such as when standing up in order to exit the bath).
The most common length would be 36″, 42″ or 48″. We recommend a side wall grab bar that spans nearly the entire length of the bathtub to provide full wall support when in the bathtub.
Where should I place and install the side wall grab bar?
Place the grab bar horizontally about 25″ high above the tub floor to the centerline of the horizontal grab bar (this is usually about 6-8″ above the tub wall).
If you are installing a grab bar that is shorter than the length of the bathtub, we recommend centering the grab bar along the side wall to give more usable bar toward the center of the bath, where the hands naturally rest when seated.
This grab bar should be in arms reach while holding on to the entry bar with the other hand. An entry grab bar and the bottom level side wall grab bar are commonly used at the same time to lower ones body into the bathtub.
Have the individual sit down in the bath and reach up towards the side wall. This would be the ideal height to place the bottom level bath grab bar. Remember, this grab bar is used for pulling oneself out of a seated position and needs to be lower to the ground. Ideal placement varies by individual and it is totally up to your own discretion.
Any other recommendations?
You may consider placing the grab bar diagonally at 45 degrees angled toward the faucet wall if the client is in a bath chair and requires more assistance at the lower position to help pull oneself up to a standing or seated position. Pulling ones body weight on a bar angled forward can often ease strain on hands suffering from arthritis.
Are you wondering why this grab bar is referred to as the “bottom level”? This is because the grab bar sits up to 8-11″ lower than the “top level” grab bar, placed in an identical horizontal position just above it. This “top level” horizontal grab bar will be discussed in section #3 below.
For basic slip prevention in a bathtub, you can stop reading. If you would like to achieve advanced slip protection in a bathtub, continue reading for the next two grab bar bath wall locations.
#3 Side Wall Grab Bar (Top Level):
Why is it important?
A top level side wall grab bar is important for hand grip when seated in a bath seat or when standing in the tub (such as when standing up in order to exit the bath) .
This grab bar is a top level grab bar, meaning that it is meant to provide hand support at an elevated / higher vertical position while in the bathtub, as compared to the lower level grab bar, which is used to provide hand support at lower elevations in the bathtub, such as when sitting on the bath floor without a bath seat.
Which bar shape, length, and quantity do I need?
We recommend the same grab bar length as whichever you decide to use for the bottom level side wall grab bar, in section #2 above.
The same recommendations apply to this top level grab bar, as both the bottom level and top level grab bars should be identical.
Where should I place and install the side wall grab bar?
Place the grab bar horizontally about 33-36″ high from the tub floor to the centerline of the horizontal grab bar. Note that this grab bar placement should be about 8-11″ higher than the bottom level grab bar in section #2 above.
The same recommendations for the bottom level grab bar in section #2 above apply to this top level grab bar.
Have the individual stand up when in the bath (such as when the individual is preparing to exit the bath). The ideal height to place the top level horizontal grab bar would be slightly higher than where the hands naturally fall by the individuals side. Remember, this grab bar is used for balance while standing in the bathtub, as compared to the lower level grab bar that is utilized for pulling/pushing oneself out of a seated position. Ideal placement varies by individual and it is totally up to your own discretion.
Any other recommendations?
If desired, a top level grab bar can be shorter than the bottom level grab bar, however, the top level grab bar should be placed in a horizontal position that is closest to where one stands and enters/exits the shower, as this is mainly used for hand support for those actions.
#4 Front Wall Grab Bar (Side of Handles/Spout):
Why is it important?
A front wall grab bar is important for maintaining balance when in the motion of lifting oneself up or standing in the bathtub.
This grab bar has similar grip utility as compared to the top level side wall grab bar in section #3 above.
The most common length would be 24″ or 36″ (This measurement depends on the width of the bath).
View our “other recommendations” section below for an additional grab bar shape that is commonly substituted and to learn more about the set ups that may not require this grab bar installation.
Where should I place and install it?
Place the grab bar horizontally (east to west) about 33″ to 36″ from the floor to the top of the grab bar.
This grab bar placement height should be level with the “top level” side wall grab bar in section #3 above.
If you are installing a grab bar that is less than 32″, shift the grab bar to the center of the wall to give more usable grab bar to the user when standing.
Any other recommendations?
When considering bathtub grab bar placement, if possible, we recommend a few simulations with the person who will be using the grab bars. Have the person step into and out of the bathtub (over the bath wall lip), have the person sit down into the bathtub (or onto the bath seat). This full bathing simulation will help you notice exactly where grab bars should be placed to provide the most assistance to the individual. Bathtub grab bar placement ultimately comes down to the user’s preference for hand grip location, the length of the bath, and the number of surrounding support walls.
For additional grab bar shapes, we recommend exploring our complete line of bathtub grab bars.
If you have a shower & bathtub combination setup, we recommend you also explore our shower grab bars.
A peened grab bar is a grab bar that has a brushed stainless steel finish with a textured surface that provides additional surface grip. Peened grab bars are especially helpful if the grab bar is going to be installed in an area that may be wet or if the user’s hands may be wet, such as a shower or bathtub.
The peened surface feels a bit more rough and textured than a standard smooth surface grab bar.
People generally refer to peened grab bars as non-slip grab bars, anti-slip grab bars, safety grab bars, and slip resistant grab bars.
Are peened grab bars ADA compliant?
Peened grip grab bars are ADA compliant. The textured finish actually does not affect ADA compliancy. However, some local ADA laws may actually require peened grip surfaces in public commercial bathrooms.
Are peened grab bars best for showers and bathtubs?
Yes, peened grab bar grips are created specifically for shower grab bar and bathtub grab bar applications, whereby the grips are generally grabbed with a wet hand.
What does peened finish mean?
During the grab bar fabrication process, the peening process consists of sand-blasting metallic balls with high pressure air onto a large portion of grab bar metal surface, which produces slight indentations. This sand blasting significantly enhances the gripping surface of the grab bar by increasing friction and reducing slippage.
Are peened grab bars similar to knurled grab bars?
Peened grab bars are similar to knurled grab bars by the fact that both surfaces have a textured finish. However, peened grab bars have a sand blasted and lighter textured grip as compared to knurled grab bars, which have a much deeper diamond pattern cross cut into the metal surface.
Grab bars are available in various surface textures to achieve varying levels of grip and appearance. The four types of grab bar grip options are as follows:
Smooth: The surface is a brushed satin finish with a smooth no texture surface.
Peened: This surface is sand-blasted to create a textured grip that feels similar to sand paper.
Knurled: This surface has miniature deep diagonal cut lines for extra grip.
Shur Grip: This surface has a diamond textured grip
What is the most popular grab bar grip type?
The most popular grab bar grip type is smooth finish. This is hands down the most widely purchased grab bar for commercial and residential use.
Yes, suction grab bars are safe, however, they do have their limits and installation obstacles.
Are suction grab bars popular?
Suction cup grab bars are very popular shower grab bars because of its easy installation that does not require tools, fasteners, or drilling.
Suction grab bars are generally designed to assist with stability and balance rather than to support the whole weight of an adult in case of a fall.
What are the issues with suction grab bars?
The major issues surrounding suction cup grab bars is the fact that the suction discs can not be mounted on the following surfaces:
Grout seams.
Textured surface.
Tile size smaller than 4″x 4″ (the suction discs will not activate).
The suction discs must be mounted on a flat, non-porous and smooth surface that has no texture. These surface requirements make suction cup grab bars unfeasible for many shower wall environments.
How much weight can a suction cup grab bar hold?
Suction grab bars found online may list weight capacities as high as 250 to 300 pounds. However, there are many suction grab bars that do not support up to 250 pounds. It really depends on the manufacturer and type of suction grab bar you are looking for.
Do suction grab bars work on drywall?
Suction cup grab bars work on any non-textured surface, however, they are not recommended for use on drywall. Rather, they are recommended on non-porous / non-textured shower and bath wall surfaces.
Are suction grab bars ADA compliant?
No, suction grab bars generally are not ADA compliant. The limiting factor is usually not meeting ADA weight capacity requirements. Many suction grab bars do not support up to 250 lbs of weight.
Are suction cup grab bars meant for showers?
Suction cup grab bars are most commonly used on non-porous and smooth surface walls in showers and baths.
Does GrabBars.com recommend suction cup grab bars?
At GrabBars.com, we do not recommend suction cup model grab bars. We have heard of stories where suction cup grab bars do not remain attached when a user grabs one to break a fall. Suction cup grab bars look nice and are easy to install, but when the floor is rushing to meet you, they may not be of much help. Suction cup grab bars generally have a much lower weight capacity than stud-mounted grab bars. Additionally, many shower wall surfaces are not ideal for suction cup securing. When possible, we recommend that our customers purchase stainless steel grab bars for stud-mounting. If you do purchase a suction grab bar, please use it for stability rather than to support full body weight.
For the best grip and non-slip grab bar surface features, especially for wet hands in the shower or bath, we recommend peened or knurled grab bars, which feature textured surfaces. A slip-resistant grab bar surface can reduce the risk of slipping or falling, thereby reducing the likelihood of injury, enhancing patient safety and reducing liability risk for facilities.
Update: “Smooth” grab bars proven to be more non-slip than “peened” grab bars when wet.
In 2018, new test data revealed that satin-finish “smooth” grab bars provide superior grip performance in wet areas as compared to “peened” grab bars. In September 2018, a test commissioned by Bobrick Washroom Equipment, Inc., and performed by Bureau Veritas Consumer Product Services, Inc., concluded that the slip-resistance of a satin-finish “smooth” grab bar surface provides similar traction to a peened-finish grab bar when grabbed with a dry hand. When grabbed with a wet hand, the surface of the satin-finish “smooth” grab bar was found to provide 10 percent more traction than the surface of the peened-finish grab bar.
As a result of these findings, we at GrabBars.com are updating our recommendation for non-slip grab bars to include the standard “smooth” grip.
Grab bar weight capacity varies by grab bar type, and most importantly, by the strength of the backing that the grab bar is mounted on.
What is the ADA compliant weight capacity requirement for grab bars?
According to federal ADA guidelines, it is required for a grab bar to be able to support up to 250 lbs (114 kgs) when installed in public places. This is because a grab bar is meant to support the user’s full body weight.
What are the strongest grab bars?
Grab bars are only as safe as their mountings! The stronger the mounting, the more weight a grab bar can hold. When considering what is a strong grab bar, you should focus on the grab bar mounting rather than the actual grab bar and shape itself.
Grab bars mounted into wall studs provide the most stability and security and have a weight capacity of 300 to 500 pounds.
Grab bars come in various diameters, also known as thickness. Diameter size is determined by multiple factors, including ADA requirements, location of use (commercial vs. residential), and hand size. Typical ADA bathroom grab bars are available in following 2 diameters:
1¼” thickness. (Most popular residential use grab bar. Better for smaller hands. Slightly less expensive than the larger diameter version.)
1½” thickness. (Most popular commercial use grab bar. Better for larger hands. Slightly more expensive than the smaller diameter version.)
These two grab bar diameter sizes make up about 95% of the commercial and residential grab bar market.
What is the ADA approved grab bar diameter size?
ADA compliant grab bars must have an outside diameter gripping surface (known as thickness or diameter) or cross section if not circular in the range of 1¼” – 2″. Any grab bar with a thickness over 1½” diameter is uncommon. Any grab bar with a thickness of less than 1¼” is considered an assistive device and is not actually classified as a grab bar or ADA approved.
What is the most popular ADA grab bar thickness?
For commercial applications (such as public bathrooms), the most popular grab bar thickness is 1½”. For residential grab bars (such as in home use), the most popular grab bar thickness is 1¼”.
Which grab bar diameter is best for smaller hands?
Grab bar grip thickness is a best fit solution. We recommend 1¼” grab bars for adults and children as the narrower diameter is better suited for smaller hands to grasp. Grab bars with 1¼” diameter are recommended for home use and commonly used by the elderly.
Is there a cost difference between grab bar diameters?
Larger diameter grab bars require more material during the fabrication process, which makes the product slightly more expensive than a grab bar with a smaller diameter. Our most economical grab bars are 1¼” diameter, however, the cost reduction compared to its 1½” counterpart is very small.
Which shower grab bars do I need and where should I place them? (Quantity, Shape, Length, Wall Location, and Placement Height).
⚠️This is a guide for residential shower grab bar placement (such as in a private home), where placement is at the discretion of the user and not subject to ADA law.
For commercial shower grab bar placement (such as in a public facility), where grab bar placement must abide by ADA handicap placement guidelines, read our ADA Shower Grab Bar Placement Guide.
For basic slip prevention in a shower, at a minimum, we recommend two (2) grab bars in the following shower wall locations:
Entry Wall Grab Bar
Side Wall Grab Bar
For advanced slip prevention in a shower, we recommend four (4) shower grab bars in the following shower wall locations:
Entry Wall Grab Bar
Side Wall Grab Bar
Front Wall Grab Bar
Back Wall Grab Bar
#1 Entry Wall Grab Bar:
Why is this grab bar placement important?
An entry grab bar is the most important shower grab bar because most falls occur at the point when the person is making the transfer from two different heights, usually while wet.
This grab bar is critical to steady the transition between the bathroom floor and the shower floor, where there is usually a small lip or ledge to step over.
An entry grab bar will help overcome the fear one has when putting their entire body weight on one leg while stepping onto a new surface that may be wet or slippery.
The entry grab bar can also be used for pulling oneself safely out of a sitting position while in the shower (such as when sitting in a shower chair or on a shower bench).
An entry grab bar will be much sturdier than dangerously hanging onto bathroom fixtures, glass doors, or towel bars, which have limited weight capacities and virtually no grip.
The most common length would be 18″ or 24″. We do not recommend going below 18″ as it would limit vertical coverage.
We recommend a standard smooth grab bar surface. If you desire additional grip, you can choose a peened safety grip, which may prevent vertical hand slippage.
You may consider an even longer length up to 48″ if the client is in a shower chair and requires more assistance at the lower position to help pull oneself up to a standing or seated position (the longer length enables the grab bar to go lower to the shower floor when installed).
Where should I place and install the entry grab bar?
Place the grab bar vertically about 4-6″ inward from the entrance or shower door jamb. This could be on either end of the wall depending on how the door is hung. The shower entrance is commonly on the same side as the shower handles / spout. If this is a tub shower combination, we recommend placing this on the wall nearest the tub entry point.
We do not recommend placing the grab bar too far from the showers outer edge – try to keep it as close to the shower entrance as possible.
If there is a shower door, be sure to place the grab bar inward enough (away from the entrance) so that the hand does not repeatedly bump the shower door or exterior frame and cause bruising.
Vertical height placement of the entry grab bar is up to the discretion of the user, and often comes down to height of the user and where the hand reaches comfortably when entering or exiting the shower. If there is a shower seat or chair, keep this in consideration as the hand should be in reach of the bottom of the vertical grab bar.
Any other recommendations?
If the shower has entry on both sides of the entrance, such as a sliding glass door shower, a shower with no doors, or a shower with a shower curtain, we would then recommend installing an entry grab bar on both sides of the shower entrance in case entrance habits change.
If a shower has a built in side or back wall mounted shower seat, we would also recommend installing an entry grab bar on both sides of the shower entrance.
Entry Wall Grab Bar Placement
Ready to purchase? We ship the same day. Click “Add to Cart” below!
The most common length would be 24″ or 36″ (This measurement depends on the length of the shower).
Where should I place and install the side wall grab bar?
Place the grab bar horizontally around waist height (varies depending on user’s height) from the floor to the top of the grab bar.
If you are installing a grab bar that is less than 32″, shift the grab bar from the center of the side wall towards the plumbing wall (with handles/spout) to give more usable bar to the user when standing under the water of the shower head.
This grab bar should be easily reached while holding on to the entry bar with the other hand.
Any other recommendations?
You may consider an even longer length straight shower grab bar up to 48″, placed diagonally at 45 degrees angled toward the faucet wall if the client is in a shower chair and requires more assistance at the lower position to help pull oneself up to a standing or seated position.
Side Wall Grab Bar Placement
Ready to purchase? We ship the same day. Click “Add to Cart” below!
The most common length would be 24″ or 36″ (This measurement depends on the width of the shower).
View our “other recommendations” section below for an additional grab bar shape that is commonly substituted.
Where should I place and install it?
Place the grab bar horizontally around waist height (varies depending on user’s height) from the floor to the top of the grab bar.
If you are installing a grab bar that is less than 32″, shift the grab bar to the center of the wall (underneath the shower handles) to give more usable grab bar to the user when standing under the water of the shower head.
Any other recommendations?
If you are installing both a #1 Entry Grab Bar and a #3 Front Wall Grab Bar, you may instead consider the installation of a 90 degree angle grab bar. This L-shape configuration combines both the vertical and horizontal straight grab bars into a combined grab bar for multi directional pulling.
Front Wall Grab Bar Placement
Ready to purchase? We ship the same day. Click “Add to Cart” below!
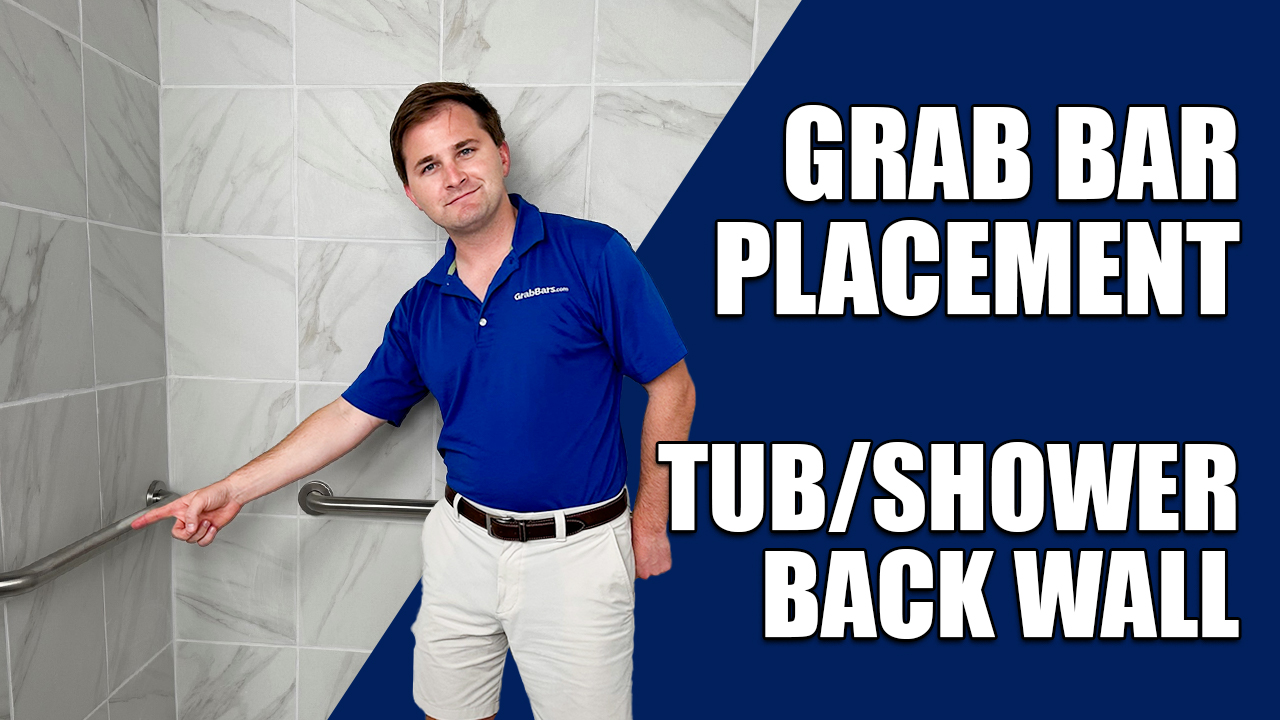
#4 Back Wall Grab Bar (Side Opposite of Handles/Spout):
Why is this grab bar placement important?
A back wall grab bar is important for maintaining balance when standing in and moving around the shower, especially with eyes closed.
This grab bar has similar grip utility as compared to the Side Wall Grab Bar in section #2 above.
Which bar shape, length, and quantity do I need?
We recommend one (1) straight shower grab bar for this application.
The most common length would be 24″ or 36″ (This measurement depends on the width of the shower).
View our “other recommendations” section below for an additional grab bar shape that is commonly substituted and to learn more about the set ups that may not require this grab bar installation.
Where should I place and install it?
Place the grab bar horizontally around waist height (varies depending on user’s height) from the floor to the top of the grab bar.
If you are installing a grab bar that is less than 32″, shift the grab bar to the center of the wall to give more usable grab bar to the user when standing.
Any other recommendations?
If the shower set up is extra long and the user does not stand, enter, or exit near the back wall, then you may skip this grab bar placement entirely.
Back Wall Grab Bar Placement
Ready to purchase? We ship the same day. Click “Add to Cart” below!
When considering shower grab bar placement, if possible, we recommend a few simulations with the person who will be using the grab bars. Have the person step into and out of the shower and while in the shower, have the person pretend to shower and wash their hair, grab the shampoo bottles, and pretend to twist the shower handles. This full shower simulation will help you notice exactly where grab bars should be placed to provide the most assistance to the individual. Shower grab bar placement ultimately comes down to the user’s preference for hand grip location, the size of the shower, shower type (walk-in vs. tub combination), and the number of shower walls.
For additional grab bar shapes, we recommend exploring our complete line of grab bars.